DIY chalkboard menu board
Skill Level: Intermediate | Estimated Time: 4 hours + dry time
Announce what you’ll be serving for dinner with a chic, handcrafted chalkboard menu.
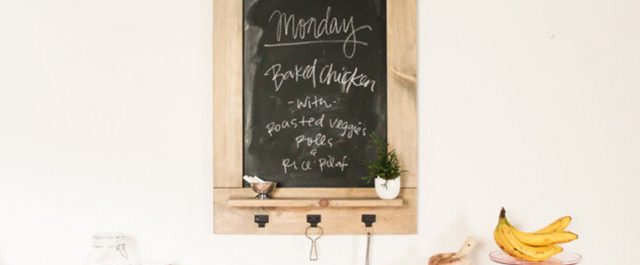
Housed in an attractive frame, this menu board includes a small shelf for storing both decorative and useful items.
Things You’ll Need

Step by Step Instructions
Step 1. Cut the Wood Parts
Measure and mark the following pieces with a carpenter’s square and pencil before cutting them with your lightweight BLACK+DECKER 20V MAX* 5-1/2 in. Circular Saw:
- (2) pieces of 1 x 4 board, 25" long for the sides of the chalkboard frame
- (2) pieces of 1 x 6 board, 24" long for the top and bottom of the chalkboard frame
- (2) pieces of 1/2 x 2" trim, 25" long for the chalkboard header
- (1) piece of 1 x 4 board, 20" long for the shelf
- (1) piece of hardboard, 2 x 3' long for the chalkboard

Step 2. Paint the Chalkboard Surface
Place the 2 x 3' hardboard panel on a flat surface, with the smooth side facing up. Place the four pieces of the frame (25" 1 x 4 pieces for the sides and the 24" 1 x 6 boards for the top and bottom) along the edges of the hardboard. Trace along the inside of the frame with a pencil to mark the chalkboard area. Mark off the space for painting using painter’s tape, 1/4" outside of the penciled guidelines.
Apply an even coat of chalkboard paint with a foam roller and allow to it dry completely before applying a second coat or as indicated by the manufacturer.

Step 3. Attach the Shelf
Apply a thin bead of wood glue on one long edge of the 1 x 4 shelf. Center it horizontally 1" down from the top edge of the bottom 1 x 6 frame board. Clamp it in place with two C-clamps and allow it to dry overnight. Reinforce the joint by driving two 1 1/2" wood screws through the back, using the BLACK+DECKER 20V MAX* Lithium 2-Speed Drill/Driver.
Step 4. Frame the Chalkboard
Remove the painter’s tape from the chalkboard and place it face up on a level work surface. Apply wood glue to the back of the bottom 24" 1 x 6 frame piece (with shelf) and place it with its bottom edge and ends flush with the hardboard, then clamp it in place with two C-clamps. Glue the two 1 x 4 frame pieces on either side of the chalkboard with the edges of the boards flush with the edges of the hardboard, and secure with clamps. Glue and clamp the top 1 x 6 frame piece at the top of the chalkboard.

Drive 5/8" wood screws through the back of the hardboard and into each corner of every frame piece.
Step 5. Add the Decorative Header
Apply wood glue to the backs of the 25" chalkboard header trim strips. Position them to flush with the top and bottom edges of the top 1 x 6 frame piece, overhanging the frame 1/2" on both sides. Clamp the trim in place and let the glue dry overnight.
Step 6. Sand the Frame + Trim
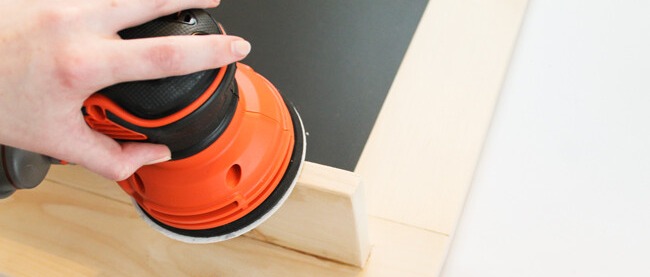
Prep the bare wood for staining by sanding all surfaces and edges smooth with your BLACK+DECKER 5 in. Random Orbit Sander and 120-grit sandpaper.
Step 7. Apply Finish
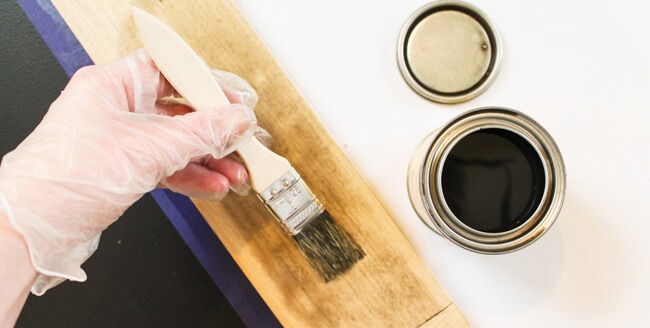
Tape off the edges of your chalkboard with painter’s tape to protect it from the finish. Apply stain with a paintbrush and wipe off excess with a paint rag. Be sure to cover your work surface and work in a well-ventilated area.
Allow the stain to dry as directed, then apply a few coats of varnish with a clean paintbrush, as directed. Let the final coat dry overnight, following the manufacturer’s suggested dry time.
Step 8. Add Decorative Hooks
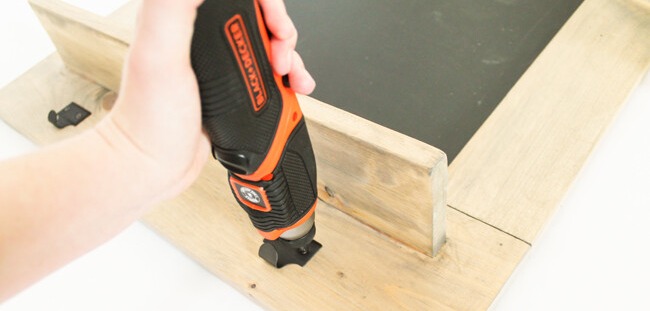
Add small hooks below the shelf for keys or small kitchen items. Get into tight spaces with the BLACK+DECKER 4V MAX* Lithium Pivot Screwdriver and secure each hook underneath the accessory shelf with the included hardware.
Step 9. Hang the Chalkboard
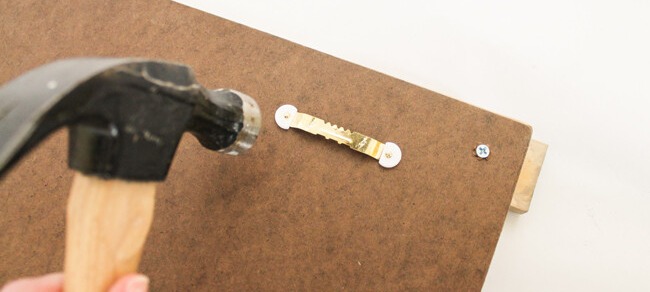
Install a sawtooth hanger 1 1/2" inward from each side edge and 3/4" below the top edge of the hardboard back panel, securing the hanger with the included nails. Measure the distance between the centers of the two sawtooth hangers to determine how far apart to install your drywall anchors. Transfer this measurement to the wall.
Drive two screw-in drywall anchors using the drill/driver. Drive a 2" screw into each hanger, leaving the screw heads out about 1/8". Hang the chalkboard onto the screws.
Step 10. Style the Menu Board
Keep a dish of chalk or small mementos on the shelf. Hang keys or measuring cups and scoops from the small hooks below.


