How to build an outdoor recycling center
Skill Level: Intermediate | Estimated Time: 4 hours + dry time
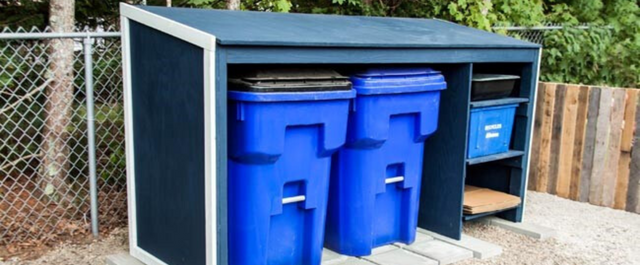
This simple shed-style structure built with exterior-grade plywood makes recycling simple, and you can construct it with two tools.
It tucks away trash cans and bins in a protective enclosure for all your recyclables.
The completed structure measures 54" tall, 32" wide, and 96" long. It's freestanding by design but can also be attached to a shed or fence.
Things You’ll Need

Step by Step Instructions
Step 1. Cut the Parts
Use the BLACK+DECKER 20V MAX* Cordless Lithium-Ion 5-1/2 in. Circular Saw to cut the following pieces from the pressure-treated 2 x 4 stock:
- (2) pieces, 91-1/2" long for the ledger and fascia
- (3) pieces, 53-1/4" long for the back legs and back divider support
- (3) pieces, 46-1/4" long for the front legs and front divider support
- (2) pieces, 25" long for the outer roof joists
- (2) pieces, 29" long for the center roof joists

Cut a 15-degree angle on one end of the front and back legs and on both ends of the 25" and 29" roof joists, without losing any length. Mark the angled cut by measuring down 1" from one corner of the leg, then draw a line from the mark to the opposite corner.
The angles on each joist should be parallel to each other. Make the cuts with the 20V MAX* Circular Saw.
Cut the following pieces from the 1 x 4 pine stock:
- (6) pieces, 30" long for the shelf supports
- (1) piece 49-1/4" long for the center splice on the back
Cut the following pieces from the 3/4" plywood:
- (1) piece, 33 x 96" for the roof
- (2) pieces, 53-1/4 x 47-1/4" for the back
- (2) pieces, 31 x 53-1/4" for the sides
- (1) piece, 30-1/4 x 53-1/4 for the center divider
- (3) pieces, 23-3/4 x 30" for the shelves
Cut a 15-degree angle on the top edges of the two plywood side pieces and the center divider, without losing any length. Mark the angle by measuring down 8" from one top corner (the top edge is 31" long on the sides and 30-1/4" long on the divider), then draw a line from the mark to the other top corner.
Layout the angles before cutting the pieces so you can fit two pieces (with the angles facing each other) on one sheet of plywood. Make the cuts with the 20V MAX* Circular Saw.
Step 2. Build a Three-Sided Box
Place the two plywood back pieces on a flat surface, butted together to make one piece measuring 53-1/4 x 94-1/2". Place the 1 x 4 center splice centered over the joint and with its bottom edge flush with the bottom edges of the plywood.
Screw the splice board onto both plywood pieces with 1-1/2" screws to splice plywood together. Stand the assembled back piece up on its 94-1/2" edge, with the 1 x 4 splice on the inside. Stand up one of the plywood side pieces so its 53-1/4" edge overlaps one end of the back piece, forming a 90-degree angle. The box slopes down from back to front.
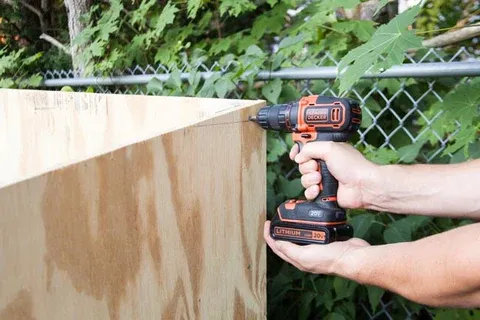
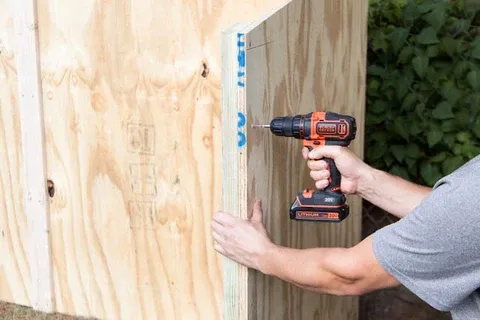
Use the BLACK+DECKER 20V MAX* Lithium 2-Speed Drill/Driver to drive four 1-1/2" screws through the side piece and into the edge of the back piece.
Repeat the process to install the other side piece at the other end of the back piece to complete the three-sided assembly.
Step 3. Install the Back Legs
Stand the back legs in each corner on the inside of the box, matching the 15-degree angles with the plywood.
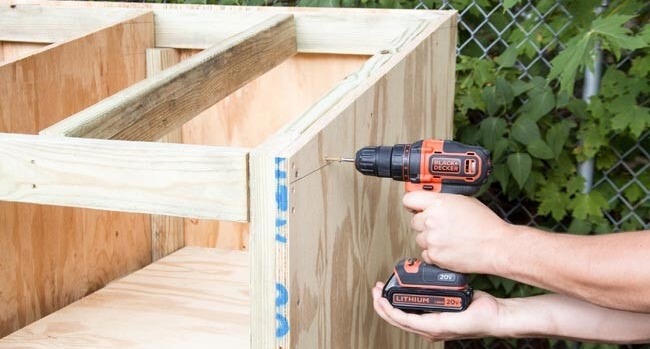
Screw the legs to the plywood through each plywood side and the back using 1-1/2" screws, spaced about 6" apart.
Step 4. Install the Front Legs
Position the 2 x 4 front legs to flush with the front edges of the plywood sides, matching the angle on the leg with the angle of the plywood.
Fasten the front legs with 1-1/2" screws, spaced 6" apart, driven from the outside of the plywood.
Step 5. Add the Ledger
Fit the 2 x 4 ledger between the back legs. Drop it down about 1/4" from the top of the plywood so that the top of the ledger is flush with the angled ends of the back legs. On the outside face of each plywood side piece, countersink three holes, 1-1/2" from the back edge of the plywood side piece.
Position the first hole about 1" down from the top edge of the plywood, and space the next two holes about 1" apart vertically.
Drill the holes to a depth of 1/2", using the 20V MAX* Drill/Driver and a 1/2" bit. Drive 3-1/2" screws through the holes to fasten the ledger against the inside face of the leg.
Drive additional 1-1/2" screws through the plywood back into the ledger, spaced about 8" apart.

Step 6. Add the Fascia
Position the 2 x 4 fascia piece between the front legs so that the fascia is flush with the front, positioned on the short side of the angle at the front of the legs.
Drill three, 1/2" deep countersink holes from the outside of the plywood, and fasten the fascia to the unit with 3-1/2" screws on both sides, as with the ledger.
Step 7. Install the Shelf Divider + Supports
Use the 20V MAX* Circular Saw to cut a 1-1/2"-deep, 4"-long notch in both top corners of the plywood shelf divider.

Cut a single notch, 1-1/2"-deep, 4"-long, in the front and back divider supports. Position the 2 x 4 back divider support against the back of the box, 23-3/4" from either inside end of the box. Screw through the back of the box with 1-1/2" screws, spaced about 6" apart to secure the support.
Position the shelf divider against the back of the box, fitting the notches in the divider under the ledger and fascia, flush against the back support, opposite the 23-3/4" side of the support, creating a 23-3/4"-wide bin compartment.
Screw the divider to the back support using 1-1/2" screws. Screw the front divider support to the divider, flush with the front, fitting the notch in the divider under the fascia.
Step 8. Install the Shelf Supports + Shelves
Screw the six 1 x 4 shelf supports horizontally to the legs and divider supports on the inside of the bin compartment, three on each side, evenly spaced vertically, to serve as shelf supports.
Insert the 23-3/4 x 30" shelves into the box, and screw them to the shelf supports from the top using the drill/driver and six, 1-1/2" screws, evenly spaced.

Step 9. Install the Roof Joists
Fit the 29"-long 2 x 4 joists between the fascia and ledger, one centered over the bin compartment and one centered over the larger space next to the bin compartment.
The top edges of the joists should be flush with the top edges of the ledger and fascia. Countersink 1/2" holes on the back of the structure and fasten through the holes with 3-1/2" screws to secure the joists.
Fasten the front ends of the joist through the fascia using three 3-1/2" screws. Fit the 25" joists against the plywood sides of the box, flush with the top edges of the plywood, and screw them on through the outside of the plywood with 1-1/2" screws spaced about 4" apart.
Step 10. Add the Roof
Center the plywood roof on the box so it overhangs the box equally on the sides and about 1" at the front.
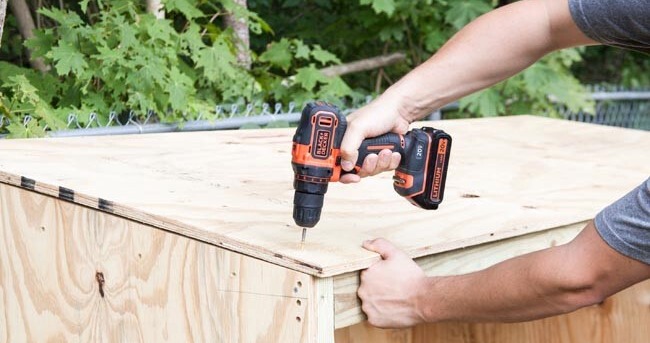
Screw the roof to the ledger, fascia, roof joists, and the divider using 1-1/2" screws, spaced about 6" apart.
Step 11. Sand + Paint
Use the BLACK+DECKER 5 in. Random Orbit Sander and 100-grit sandpaper to smooth any rough spots and blunt exposed corners and edges of the recycling center.

Paint the structure inside and out with exterior paint in the color of your choice.
Step 12. Give it Feet
Slip some patio pavers under the structure to serve as feet.
Even though you're dealing with weather-resistant wood, it can wick water, and it will last longer if doesn’t directly contact the ground.

Tip: If your recycling center strikes you as too simple or plain, dress it up by nailing 1 x 4 trim on the corners, around the perimeter, or diagonally or vertically on the sides for a Tudor appearance. Add wood shakes or asphalt shingle to the roof. Use your imagination with paint.

